I bought an Android tablet. It's a Lenovo Yoga Tab Pro.
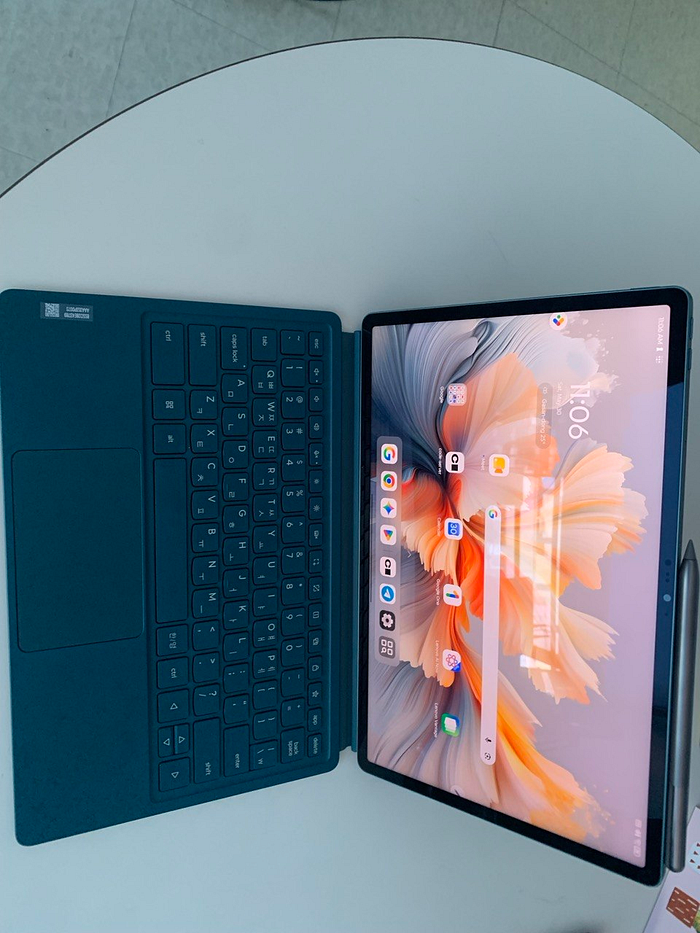
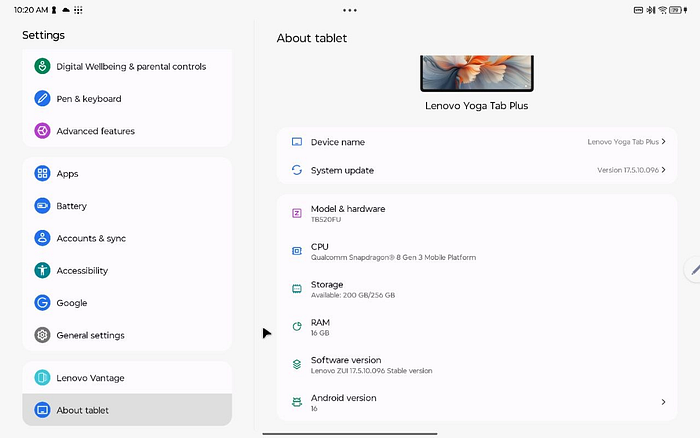
The tablet has pretty good specs with 16GB of RAM.
There's no special reason for buying it, it's a gift to myself and I follow the philosophy of "buy first, think later".
After watching YouTube, I planned to set it up as a development machine.
Linux development environment
Android 16 introduced a Linux development environment as an experimental feature. Since Android itself uses the linux kernel, it natively supports the linux terminal, and I decided to use that.
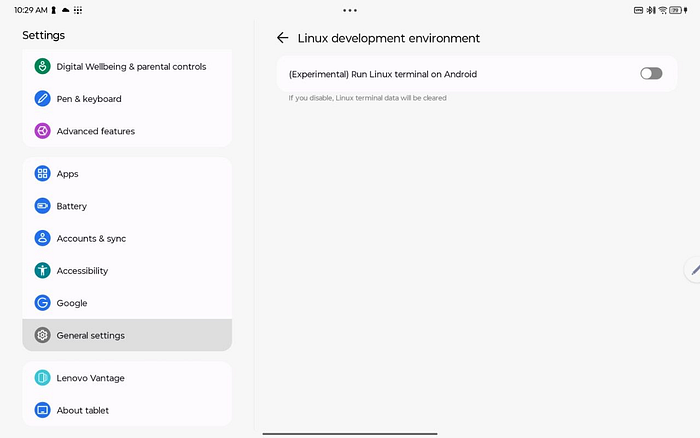
I enabled "Run Linux terminal on Android" in the developer settings. This added a Linux terminal app, and running it started the Linux installation.
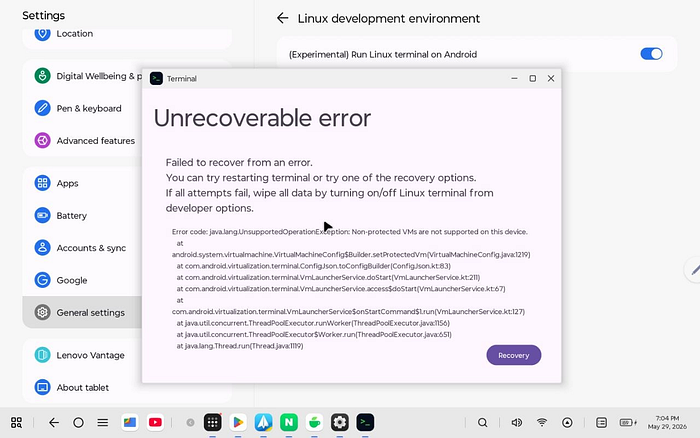
However, an error occurred during installation.
The AI suggested that the problem was due to LLVM.
Cause: Qualcomm Snapdragon hardware limitation
Lenovo Yoga Tab (including Pro) uses Qualcomm Snapdragon 8 Gen 3. The error message Non-protected VMs are not supported on this device accurately reflects the known issue with this chipset.
Android's Linux Terminal runs a Debian VM on top of AVF (Android Virtualisation Framework), which requires two conditions: the device must support AVF and non-protected VMs — meaning the host OS can access memory inside the VM. However, Qualcomm Snapdragon only supports protected VMs for security purposes (such as Play Protect), which are not suitable for running a Linux environment.
So, using Android's built-in feature failed!
Termux + proot-distro + code-server
There is a way to run Linux without AVF in userspace, which works on Snapdragon devices. While it doesn't provide kernel space access (so systemd won't work) and has limitations regarding device access, it's sufficient for using vscode.
First, install the termux and termux-x11 apps
https://github.com/termux/termux-app/releases
https://github.com/termux/termux-x11/releases/tag/nightly
Now install proot-distro and development tools.
# Installing tools in Termux
pkg install x11-repo
pkg update
pkg install proot-distro
pkg install termux-x11-nightly
pkg install xwayland
pkg install tur-repo
pkg install code-server

# Installing ubuntu container
proot-distro install ubuntu
proot-distro login ubuntu

# Then the ubuntu shell will appear
apt install -y xfce4 xfce4-terminal
apt install -y dbus dbus-x11
# Update packages
apt update && apt upgrade -y

# Basic build tools
apt install -y \
  build-essential \
  gcc \
  g++ \
  gdb \
  gdbserver \
  make \
  cmake \
  git \
  curl \
  wget \
  unzip \
  zip \
  pkg-config \
  ltrace \
  strace \
  binutils \
  file \
  xxd \
  netcat-openbsd \
  socat \
  patchelf \
  elfutils \
  tmux \
  htop \
  tree \
  jq \
  ripgrep \
  locales

# Python
apt install -y \
  python3 \
  python3-pip \
  python3-venv \
  python3-dev

# Node.js LTS (nodesource)
curl -fsSL https://deb.nodesource.com/setup_lts.x | bash -
apt install -y nodejs

# Check node
node -v
npm -v

# code-server (install node again after)
curl -fsSL https://code-server.dev/install.sh | sh

# locale
locale-gen en_US.UTF-8
echo 'export LANG=en_US.UTF-8' >> ~/.bashrc
echo 'export LC_ALL=en_US.UTF-8' >> ~/.bashrc
source ~/.bashrc
proot is a low-level kernel binary, and proot-distro is a convenience wrapper built on top of it.
proot-distro (shell script wrapper)
    ↓ internally calls
proot (actual engine)
    ↓ implementation method
ptrace system call interception → chroot emulation
So, the command proot-distro login ubuntu is internally converted to a complex proot command like this.
# Internally, it's converted to this complex proot command
proot \
  --rootfs=~/.local/share/proot-distro/installed-rootfs/ubuntu \
  --bind=/dev --bind=/proc --bind=/sys \
  --bind=/sdcard \
  --change-id=0:0 \
  --sysvipc \
  --link2symlink \
  -w /root \
  /usr/bin/env -i HOME=/root ... /bin/bash
Now, let's set up code server.
mkdir -p ~/.config/code-server
cat > ~/.config/code-server/config.yaml << 'EOF'
bind-addr: 127.0.0.1:8080
auth: password
password: mypassword
cert: false
EOF
VSCode on Android Tablet
Now that we're ready, there are two ways to use vscode. One is to run ubuntu vscode directly through x11, and the other is to connect to code server from an android browser.
Running it with x11 is similar to using linux, but it wasn't very convenient. I chose to use the browser method.
The process involves running code server through the termux app
# termux shell
proot-distro login user

# ubuntu shell
code-server &
Now, access localhost:8080 in your browser and add it to your home screen so it looks like a native app.
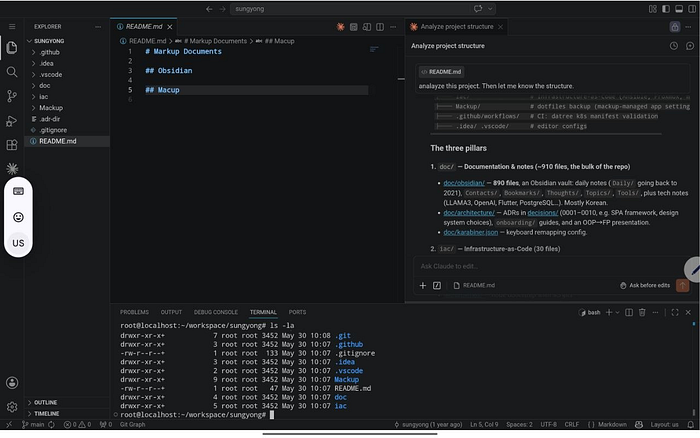
I also installed vscode extensions and the claude code plugin to set up my development environment.